Recently in Home Category

Zigbee multi-channel light controller

With a recent oven purchase I only had one device left that required the clock to be manually synchronised - a timer that I use to turn a light on in the morning. Having had to replace some remote controlled sockets with Zigbee variants I decided to do the same with the light timer so that it can be controlled by a computer that always has the correct time.

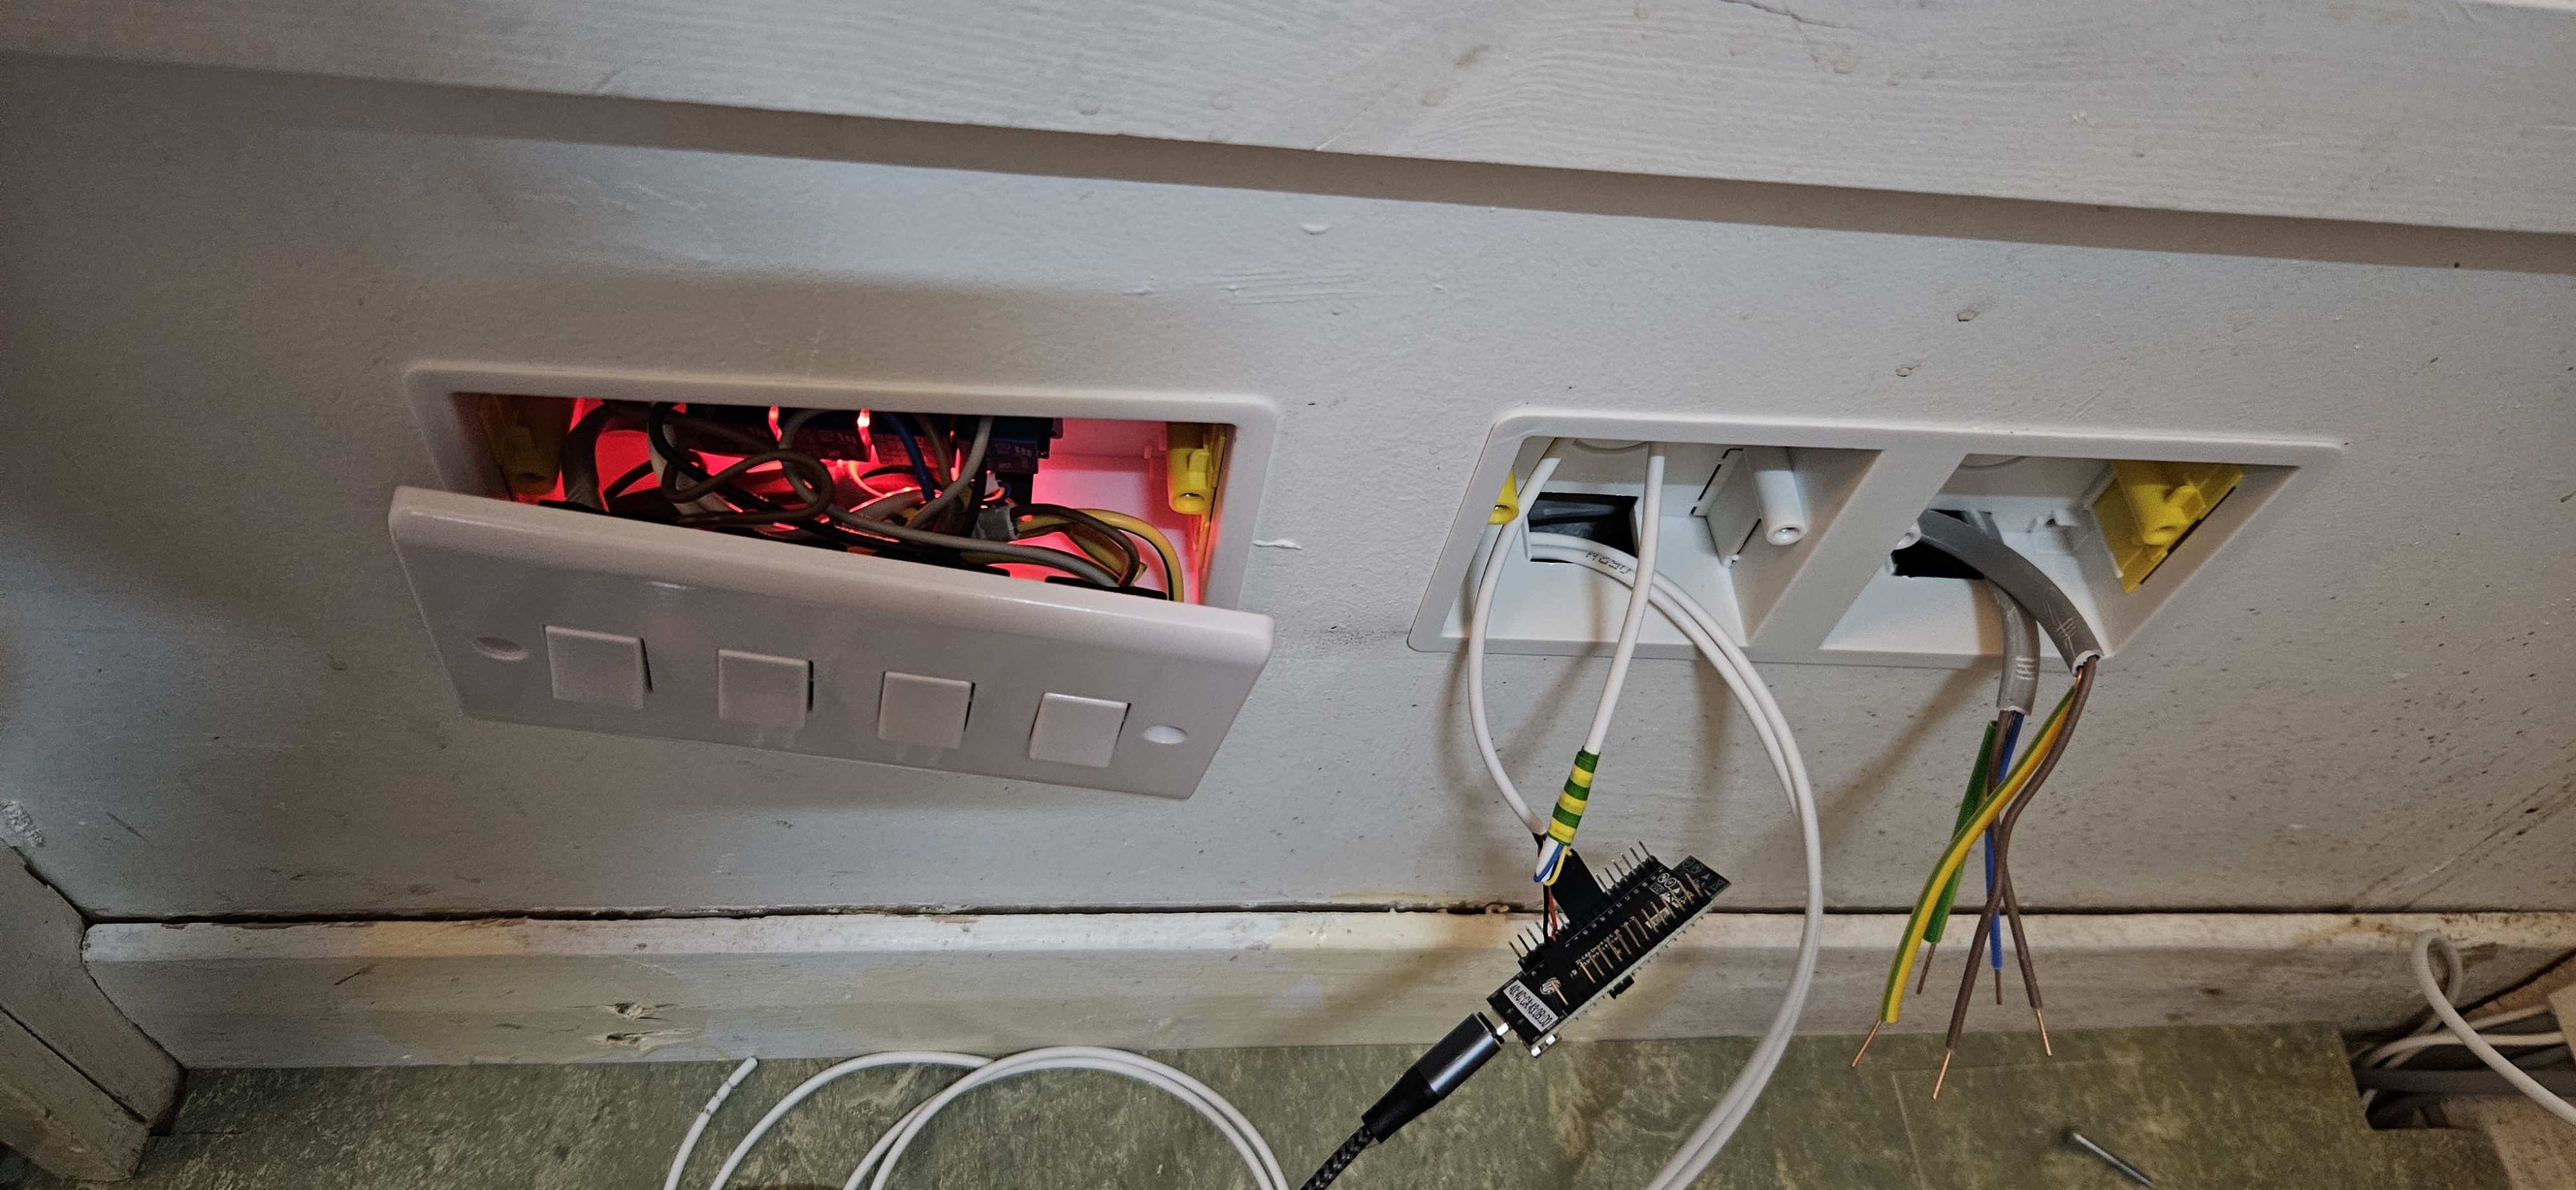
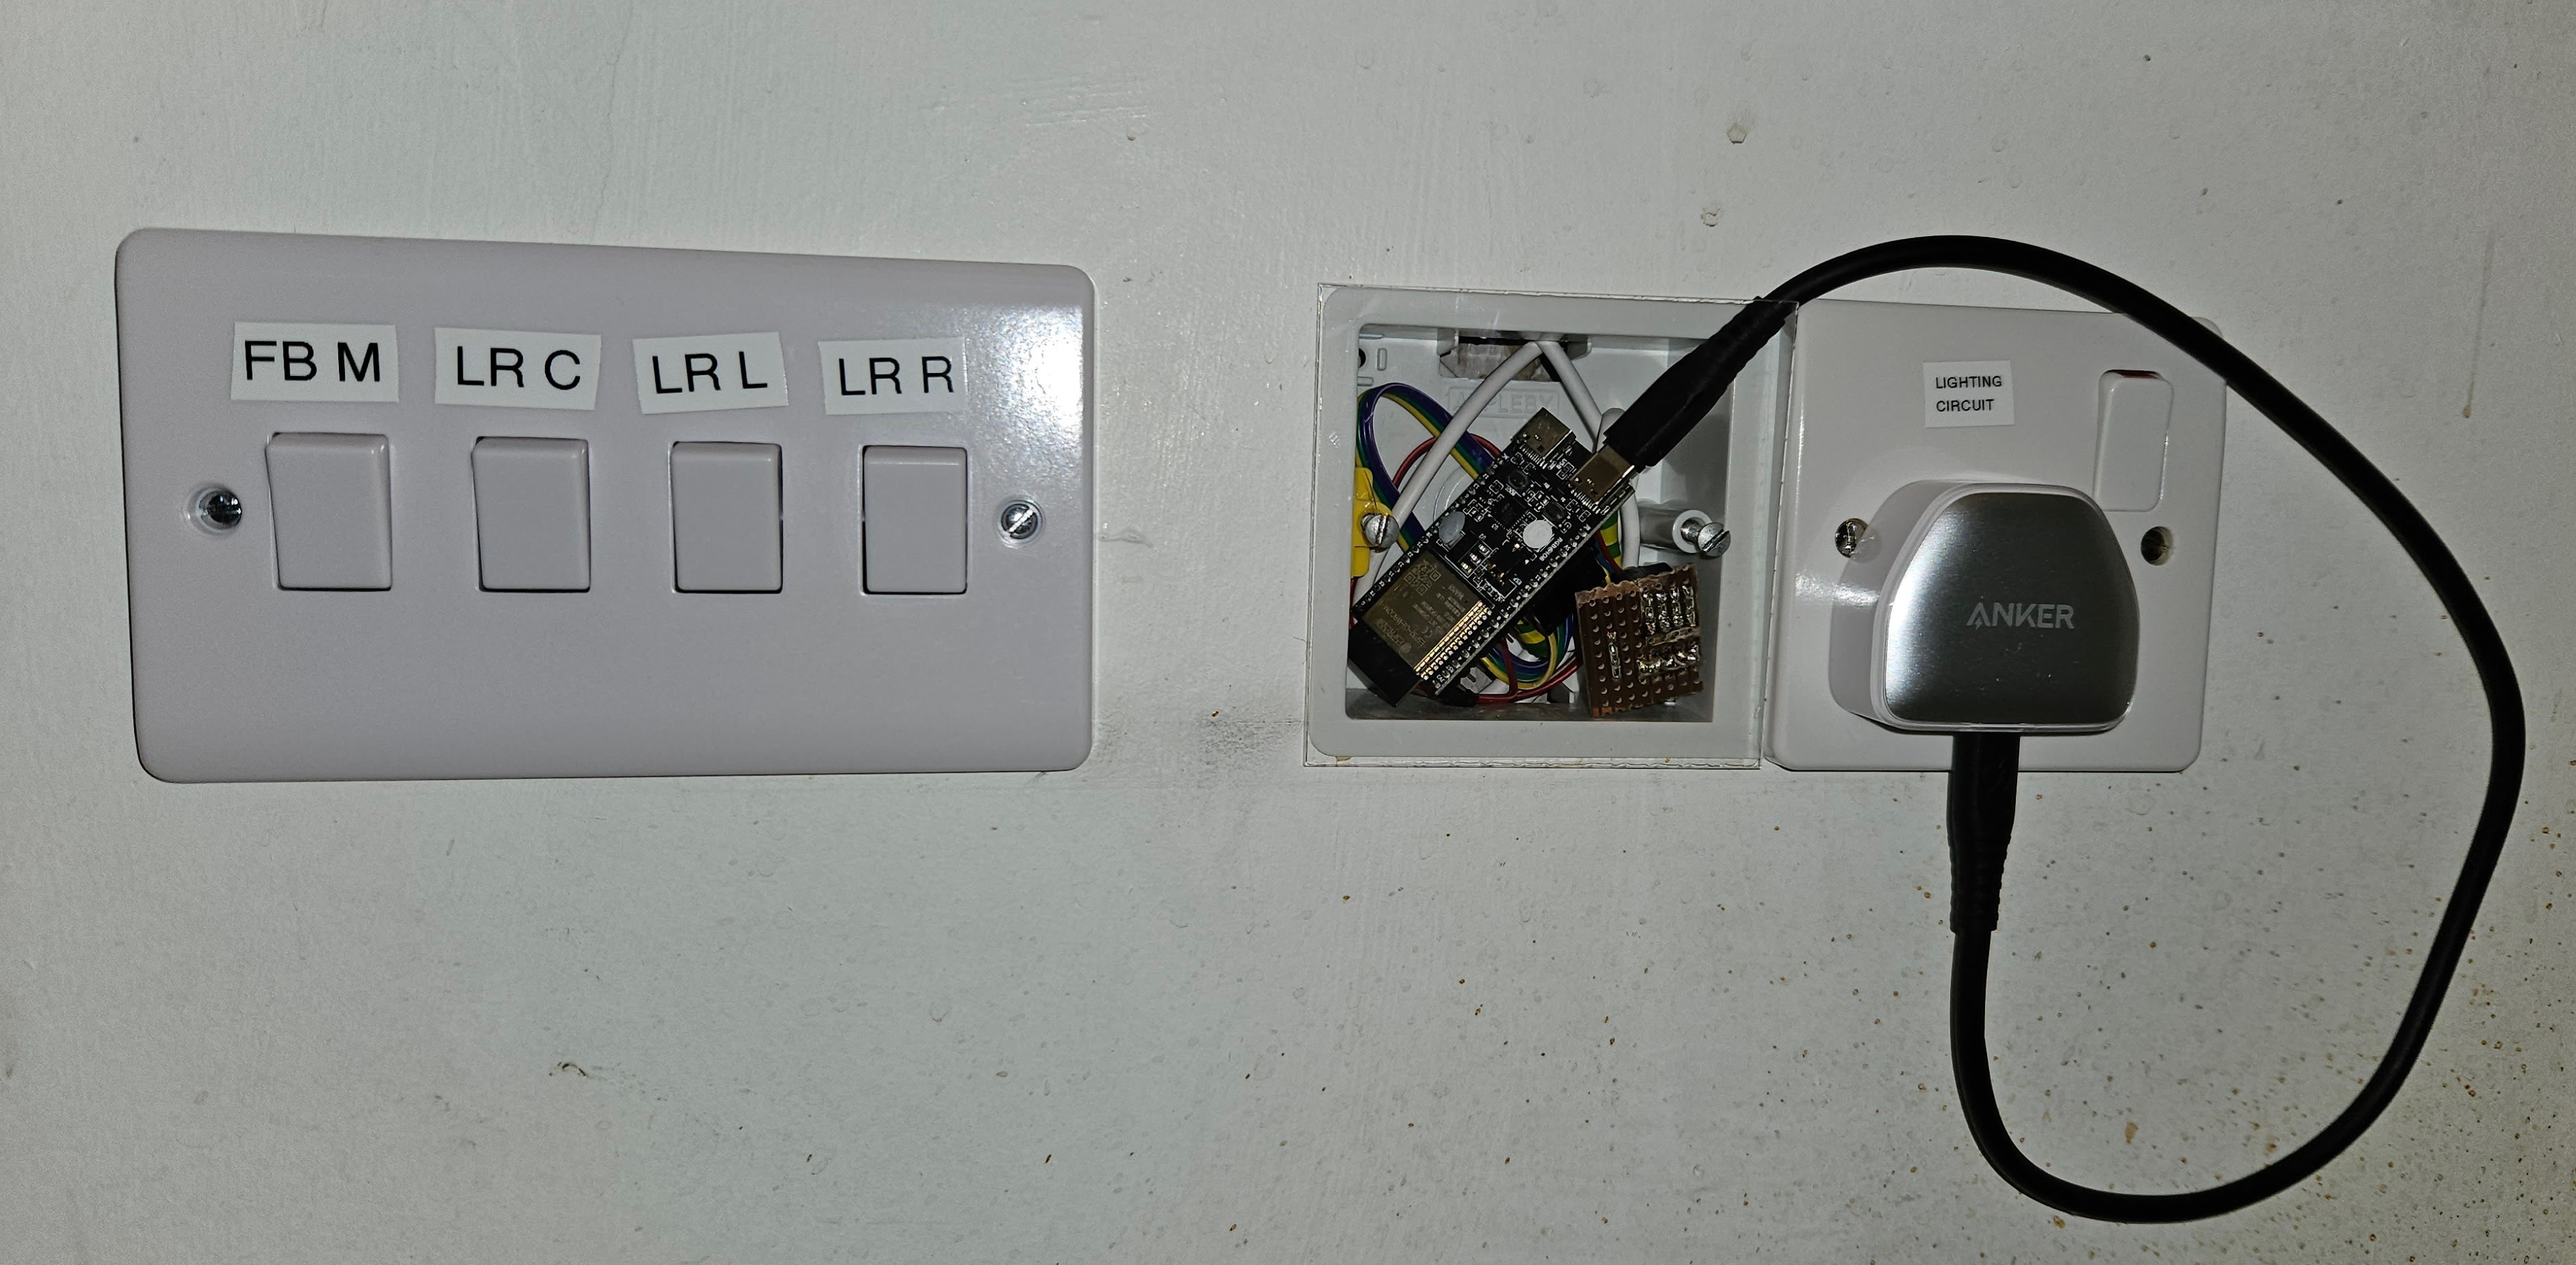
That worked ok but I wanted more integration with the light switch and since my living room lights could already be remotely switched by a different system I have consolidated both of them into a single light controller. There aren't any existing solutions for this that can handle multiple lights and multiple switches (you can have one relay/switch, or multiple relays plus multiple switches but Zigbee doesn't guarantee good integration in that scenario).

Using an ESP32-C6 I've made my own solution, the "Candle Dribbler" that satisfies my obscure requirements for how remotely controllable light switches should behave:

Left to right, low down on the wall: Opened double gang box with glowing red relays inside and 4 light switches on the front. Open single gang box with ESP32 microcontroller board hanging out of it. Open single gang box with cables hanging out.

Left to right, low down on the wall: Double gang fitting with 4 light switches labelled (FB M, LR C, LR L, LR R). Single gang box with ESP32-C6 inside behind a transparent plastic cover. Single gang socket with power supply.

Making the under-counter Fridge/Freezer more efficient

My existing fridge and freezer are over 20 years old and there are better insulated quieter models available that use less than half as much electricity.

Being under the worktop without any rear ventilation uses 25-30% more electricity too because the heat has nowhere to go. The fridge also becomes a freezer in the summer because the trapped heat at the back affects the internal thermostat resulting a feedback loop until my carrots are sitting in a frozen pool of ice.

Not enough space

Before I can get a new fridge and freezer they need to fit under the worktop. There are two popular widths for these appliances (55cm and 60cm) and both of the existing ones are 55cm wide in a space designed for that size only. In order to get the models that I want to fit I need to find an extra 5cm of space because the new fridge is only available in 60cm wide.

The cabinets to either side are made of wood so I took one of them out and made it 5cm narrower:

[Kitchen cabinet now 5cm smaller with doors that are too large]

The cabinet doors are now too wide for the cabinet so one of them needs to be made smaller:

[Cabinet door cut in half with 8mm steel rod as dowels] [Kitchen cabinet with 5cm extra space to the left of it]

There's now an extra 5cm of space so I can fit a 60cm and 55cm appliance under the worktop.

Not enough ventilation

The instructions for the new fridge and freezer come with warnings of damaging the compressor if there's no ventilation at the back. Some of the heat can escape over the top (to the front of the worktop) but not enough to stop an excessive build-up of heat in the summer.

I cut a long narrow ventilation hole in the back of the worktop and laser cut a cover for it out of plastic:

[Kitchen worktop leading into the dining room with a 6cm wide vent at the back of it]

[Kitchen worktop from above with a 6cm wide vent at the back of it]

There's now enough ventilation for the heat to escape at the back. Be careful doing this with old appliances because my freezer immediately developed a condensation problem now that the excess heat was no longer warming the outer surfaces.

New fridge and freezer

With all the worktop and cabinet alterations complete, I can now install the new fridge and freezer:

[Under-counter fridge and freezer below the kitchen worktop with a 6cm vent at the back aligned to the space between the cabinets and combined width of the two appliances]

Four! I mean five! I mean fire!

These smoke alarms look like they're as old as the house itself:

Visibly aged smoke alarms

I put some other alarms up in 2015 and moved these ones into bedrooms but they were in need of replacing.

There are new minimum standards for fire alarms in Scotland that come into effect on 2021-02-01 that require interlinked smoke alarms in the main living area and hallways/landings as well as a heat alarm in the kitchen.

None of the other alarms are interlinked so I've replaced all of them with mains powered interlinked alarms. There's even a control panel to make the entire house start beeping or identify which alarm is detecting fire when it's not obvious:

Control for Smoke and Heat Alarms with Test and Hush/Locate buttons

I'll automatically get an email if a fire is detected.

Faster hot water

The hot water in my house used to be provided by an immersion heater fed from a cold water tank in the loft (2 decades ago) and was distributed by 22mm pipe. When a gas boiler was installed the original pipes were left in place.

Having recently had the boiler replaced (with a higher maximum hot water output) I investigated what I could do to reduce the time taken to get hot water out of the tap and discovered that the 22mm pipes leading out of the cupboard went further than expected.

A 22mm pipe holds more than twice as much water as 15mm pipe so this results in a lot of unnecessary water in the pipes between the boiler and the taps. While this has little impact on the shower (mostly fed by newer 15mm pipe), it doubles the time taken for hot water to reach the tap in the sink because almost the entire run was in the old 22mm pipe (7 metres of it).

Even at a fast flow rate of 6 litres per minute that's an unnecessary additional 13 seconds for the hot water leaving the boiler to come out of the tap in the shower room and an extra 8 seconds for the kitchen sink at 10 litres per minute.

All of the 22mm pipes have now been replaced with 15mm pipes and the hot water now reaches the tap faster:

[Boiler with hot water pipes cut off] [Water pipe in 22mm branching off to 15mm]

[Water pipe in 15mm branching off to 15mm] [Pipe behind shower room sink in 22mm]

[Pipe behind shower room sink in 15mm] [Boiler reconnected with 15mm hot water pipe]

Laser Engraved Light Switch

I've used a laser cutter to engrave a light switch with symbols for the two switches outside my shower room:

  • Shower light and extractor fan
  • All other lights in the room
[White 2 gang light switch with a shower symbol engraved above the left switch and a light bulb engraved above the right switch]

Restoring a Garden Bench

More electric sanding, the remains of my mahogany wood stain and rubber feet... the second bench is now complete and back in the garden:

[Bench before starting work] [Bottom side of the bench after partial painting]

[Seat bars after painting] [Top side of the bench after partial painting]

[Bench outside on slabs next to the greenhouse]

Garden Bench with feet

I've now added rubber feet (solid rubber door stops) to the first garden bench and put it back outside:

[Bench leg with rubber door stop on the bottom]

[Bench outside on slabs next to the fence]

House Power Meter

I've recently installed an 80A Power Meter on the electricity supply to my house. It measures the current active, reactive and apparent power as well as providing a count of the total active and reactive energy. These reading are updated every second.

After installing a 100A isolator and pulling through extra cables, the installation of the power meter was relatively straight forward. It's in an enclosure with an 80A circuit breaker, located inside to avoid inconvenience if it ever trips and because the distribution board doesn't have enough space for it.

[Closed metal enclosure with electricity supply input/output cables and RS485 cable] [Metal enclosure with lid open showing 80A and 6A circuit breakers and the Power Meter] [Metal enclosure with the cover off showing the circuit breakers and Power Meter] [Electricity distribution board with the live supply out of the 100A isolator going via the Power Meter]

I intend to write an Android app for a real-time view but for now I'm just collecting historical data:

Bar chart of total active energy usage for each day of the month with detailed views of active/reactive power usage and supply voltage

Restoring a Garden Bench

I've started restoring my garden furniture as the existing paint is now peeling off everywhere. I'm using an electric sander which is a lot easier than sanding by hand. Some mahogany wood stain has then been applied with a paintbrush to the bench, floor covering and my clothes.

The first bench is now complete:

[Bottom side of the bench after sanding] [Seat bars before sanding]

[Top side of the bench after sanding] [Bottom side of the bench after partial painting]

[Top side of the bench after completion of painting]

Garage Roof

The roof on my garage had been leaking for over a year; it has now been replaced by Taylor Joinery Services.

[Original garage roof with felt] [Garage without roof]
[Garage with wood roof only] [New rubber garage roof]

About this Archive

This page is an archive of recent entries in the Home category.

Green is the previous category.

Information Security is the next category.

Find recent content on the main index or look in the archives to find all content.

Content authored by myself is just my honest opinion.

  • Linux
  • Get Firefox!
  • Get Thunderbird!