I've previously modified a radio clock that can't get a reliable time signal to use NTP via an ESP32-S3 but have recently improved it so that it waits for the time to be known before powering on the radio clock, which avoids the radio clock deciding that there's no time signal and reverting to manual mode. It now also automatically presses buttons to configure the radio clock to display 24 hour time.
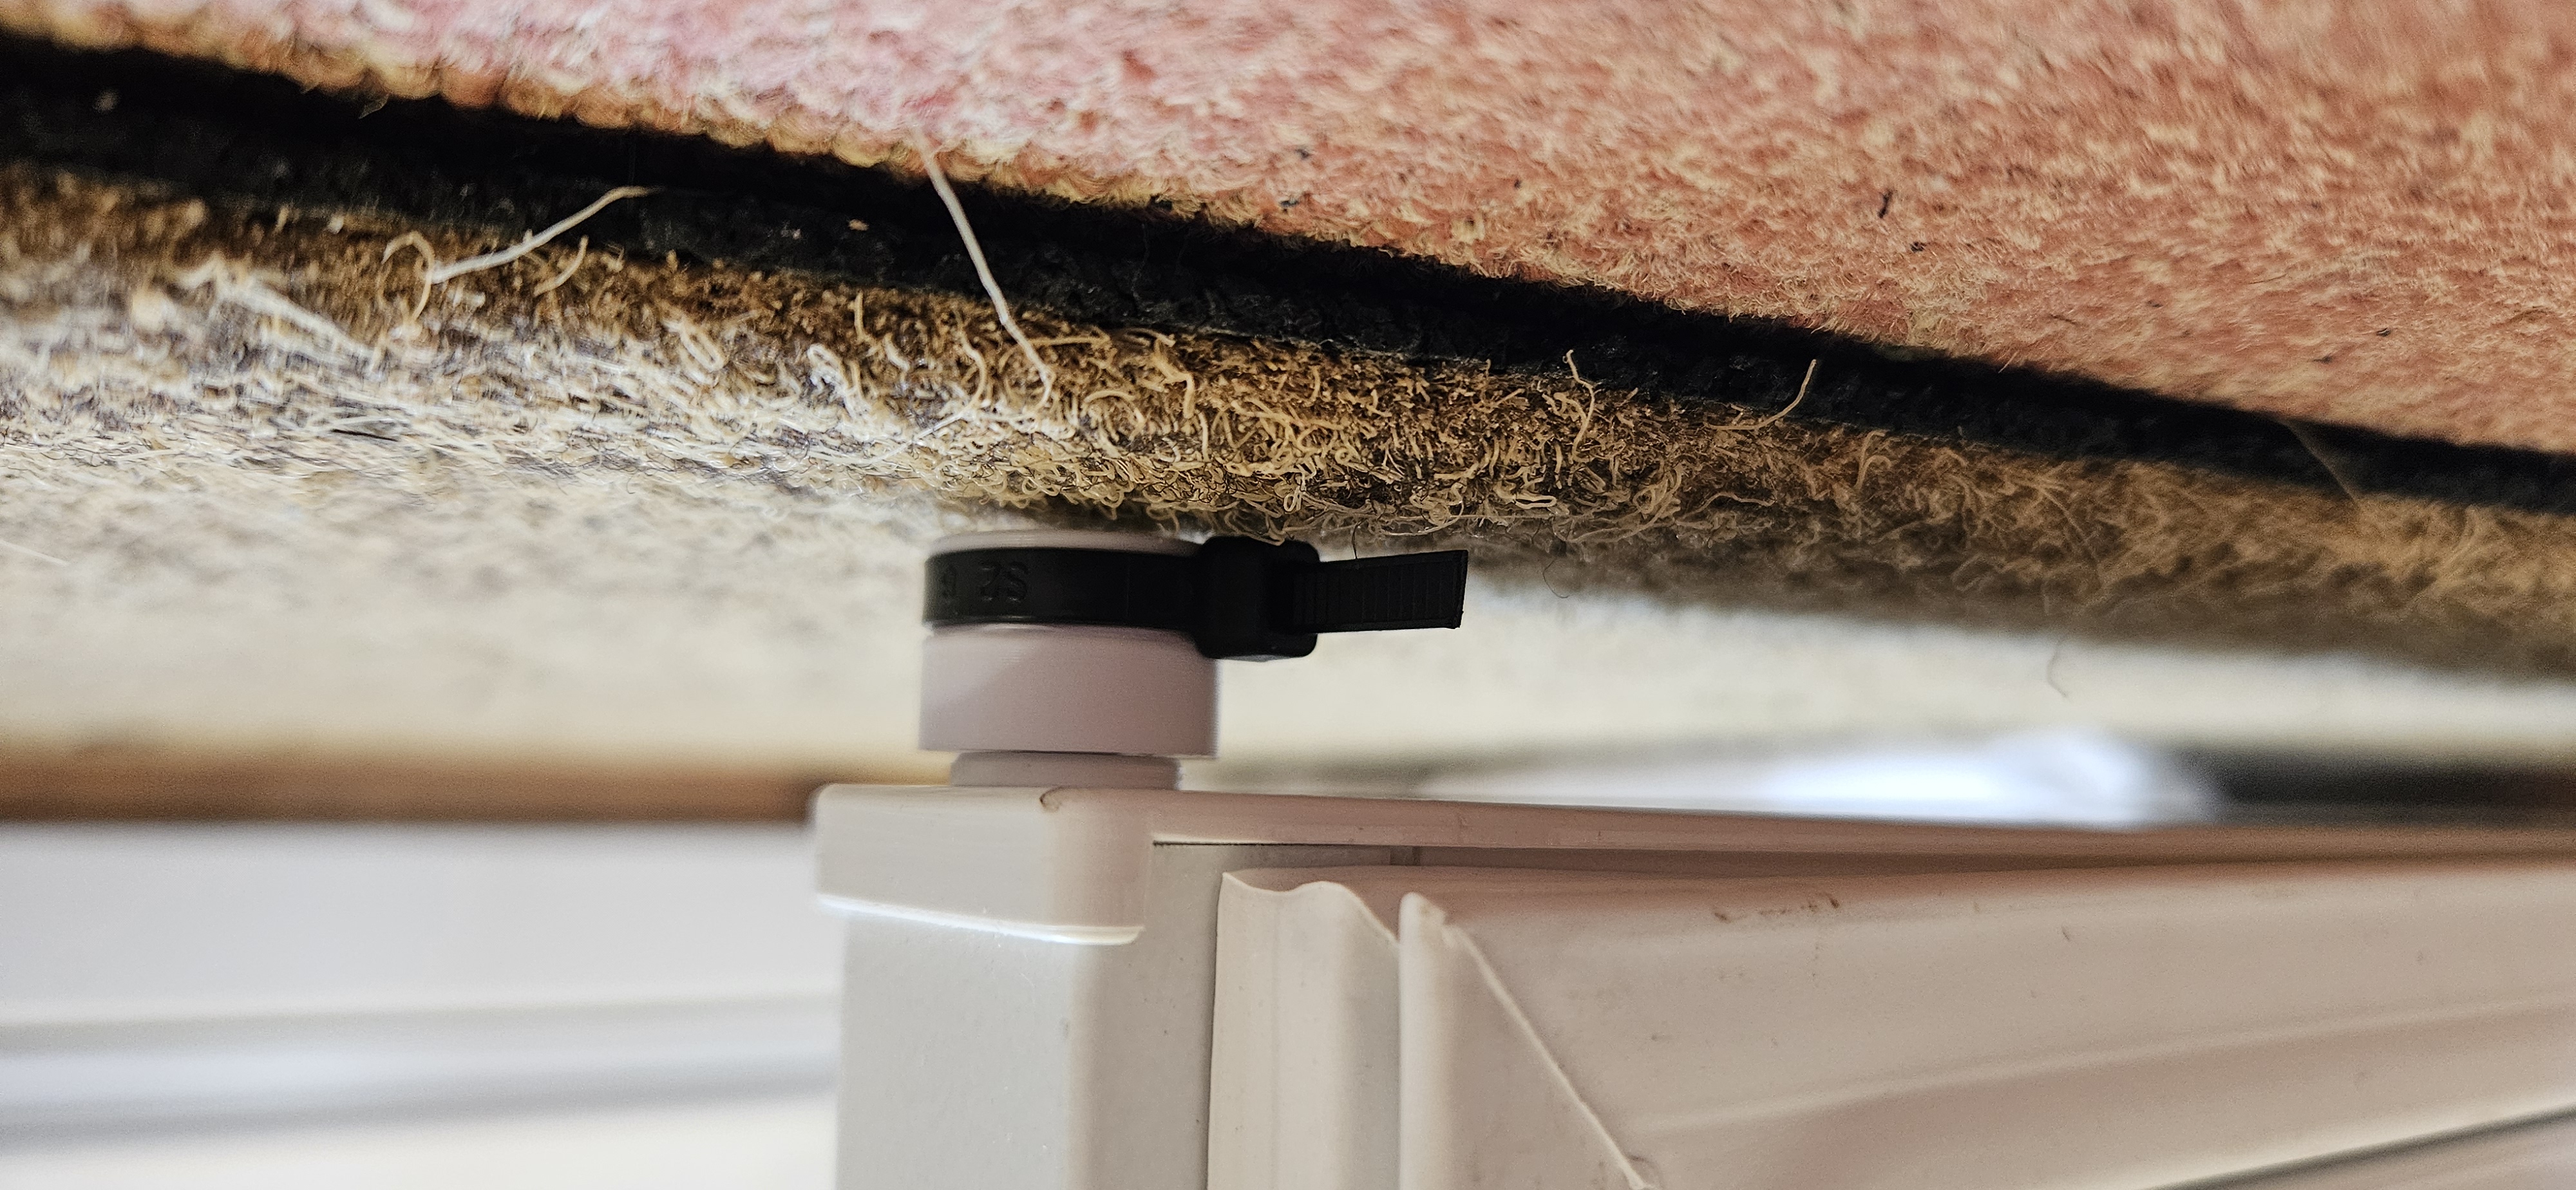
After leaving the freezer door open all evening twice in hot weather in previous years I started working on a fridge/freezer door alarm to warn me if this happens again. My model of fridge/freezer happens to have convenient anchor points for this:
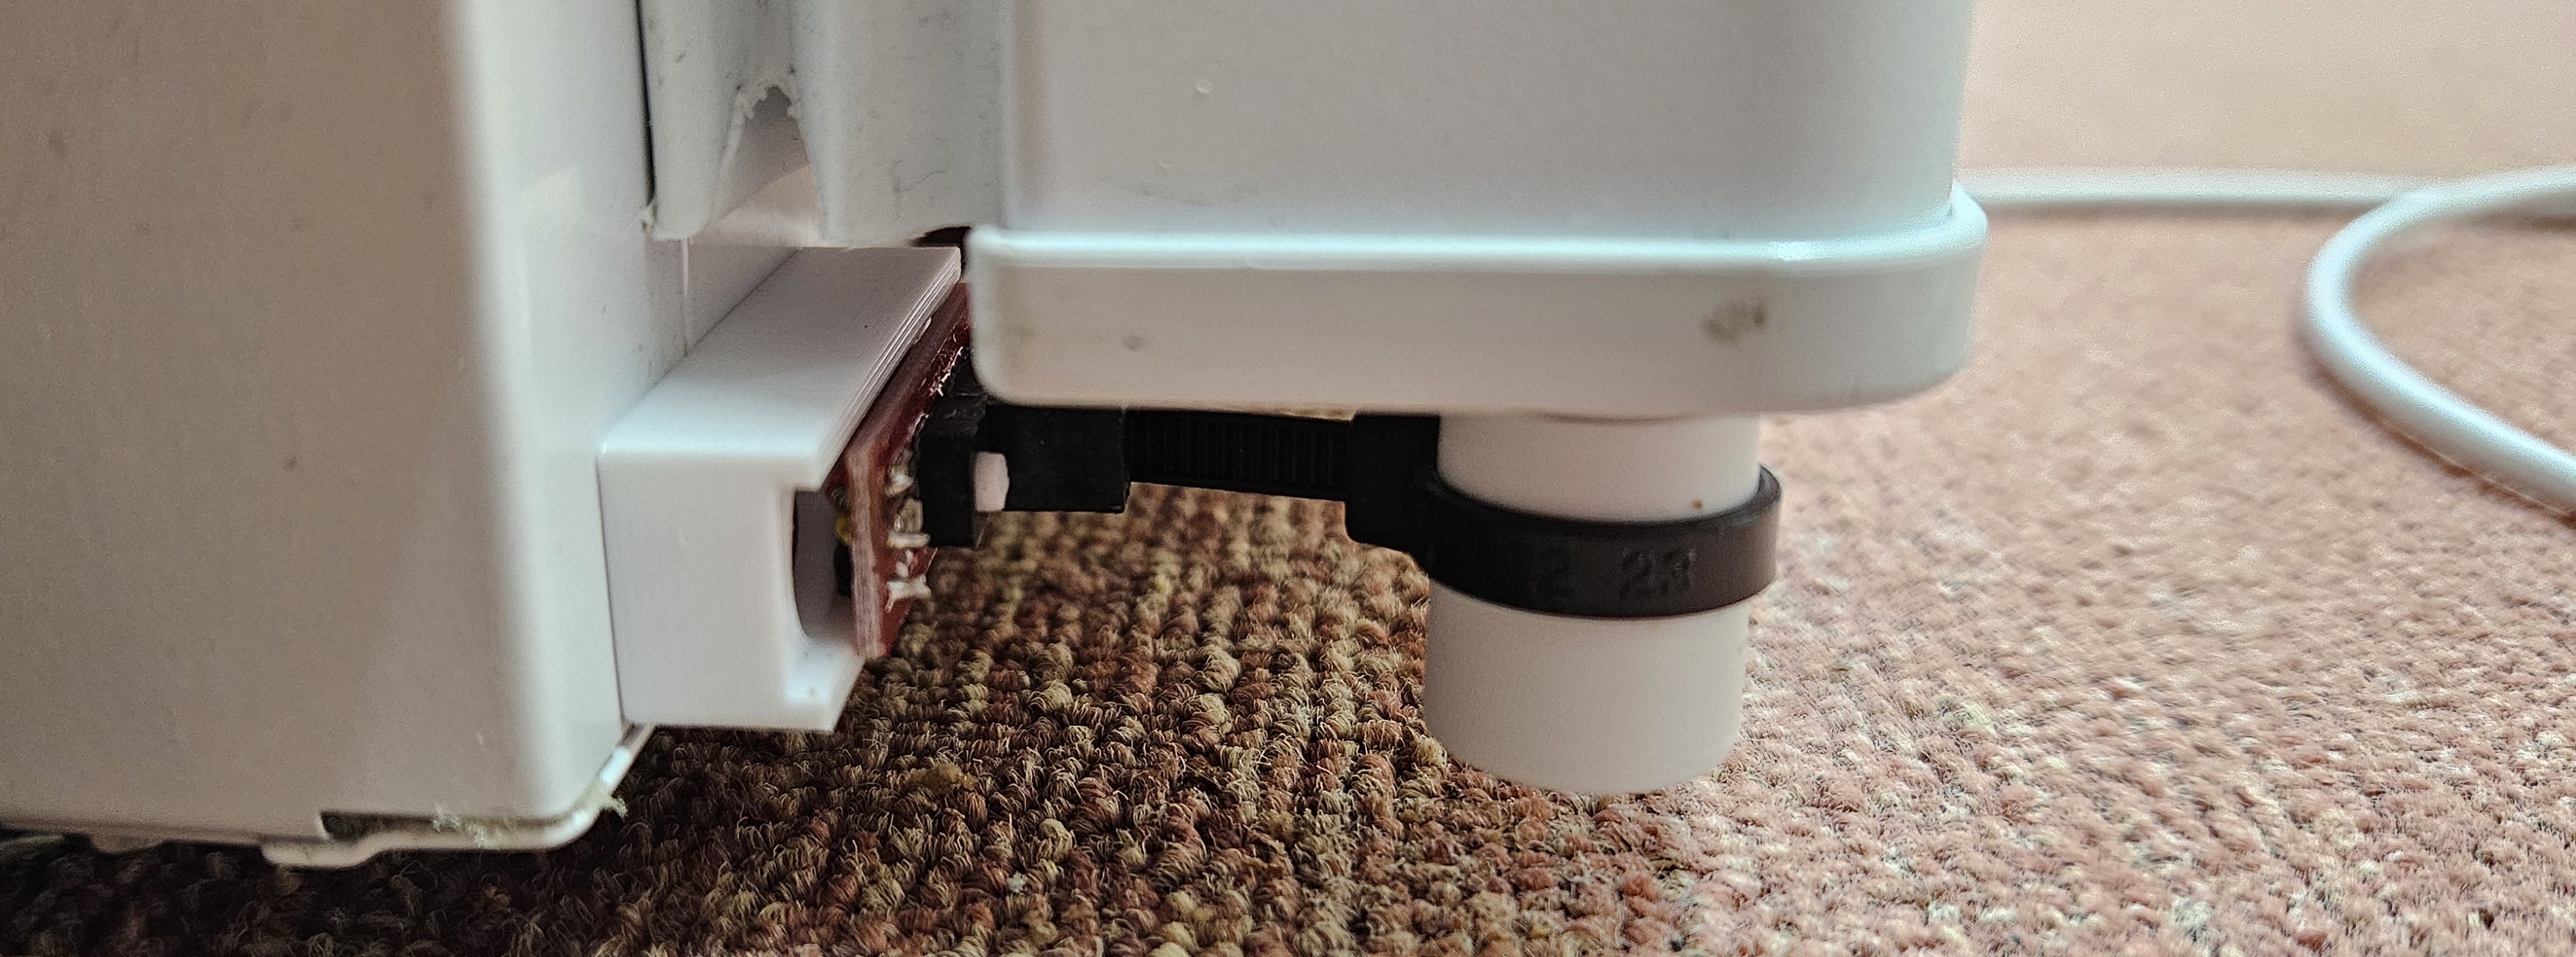
Using an ESP32-C6 I've made the "Eightfold Seal" device that supports two doors and a buzzer alarm with increasing frequency when the door is left open. It communicates using Zigbee allowing remote configuration and status information, as well as the possibility to cancel the current alarm if the door is intentionally left open.
![[Home Assistant list of controls for the Eightfold Seal device: cancel/enable switches for the alarm and configuration of timing for the two alarm stages]](/assets/2025/05/11/hass_eightfold_seal_controls.png)
![[Home Assistant list of sensors for the Eightfold Seal device: current alarm and door open/closed state as well as uptime and Zigbee uplink information]](/assets/2025/05/11/hass_eightfold_seal_sensors.png)
When either door is open even slightly, this is detected and the buzzer will sound after a delay. Here are some videos with the buzzer configured for no delay to demonstrate the sensitivity:
I had to print a custom lower profile insert for the freezer door because there's a mat nearby and very little clearance below the door because of that:
Two months ago, I had a fibre internet connection installed by Openreach, which should be much more reliable than the existing copper line, but it didn't work properly. Within 2 minutes of first being connected it had lost communication entirely and then experienced intermittent packet loss throughout every day making it unusable. After 6 engineer appointments (and they didn't even show up for the last one) they continued to blame my router as being of the "incorrect type" and "overcomplicated".
They're supposed to have a service level guarantee of 48 hours but it took 47 days for them to fix this fault, which was caused by fibre cables being swapped somewhere in the Openreach network. Most of that time was spent convincing them that there is in fact a fault somewhere in the BT Wholesale or Openreach network that needs to be fixed. It would be nice if the monopoly provider of connectivity in the UK had better processes.

Alberto Balsam have brought out "new" 300ml bottles of shampoo that Tesco sell for almost the same price (£1) as the previous 350ml bottles, so you now pay the same price for less. They did the same thing 9 years ago so the commitment to reducing plastic use is a farce because the product now comes with just 60% of the shampoo it originally had.
![Alberto Balsam Raspberry Shampoo (350ml) [Source: Tesco]](/assets/2025/02/16/Alberto_Balsam_350ml_red.jpg "Alberto Balsam Raspberry Shampoo (350ml)")
£0.95 (2024)
![Alberto Balsam Raspberry Shampoo (300ml) [Source: Tesco]](/assets/2025/02/16/Alberto_Balsam_300ml_red.jpg "Alberto Balsam Raspberry Shampoo (300ml)")
£1.00 (2025)
With the Zigbee remote-controlled lights and sockets I now needed a way to switch them that's more convenient than a mobile phone. There are various solutions available for this but the best looking one I could find is the IKEA TRÅDFRI Shortcut Button that can be used with any Zigbee coordinator. I can use these to switch lights on and off, play/pause music and turn speakers on/off.

They work well but the battery management in the first version of the firmware isn't great and they regularly lose network pairing information for me when the battery runs out so I upgraded to the latest firmware (which is documented as fixing this issue).
One of the often requested features on these buttons has been the ability to set an action on a double press (as well as the original single press and long press gestures). The later firmware versions have added this feature.
Unfortunately to implement a double press requires delaying the reaction to a single press. Lights that would previously change instantly now take about half a second to do so which is visibly slow and irritating when you know that it used to be faster and doesn't have to be this way.
Trying to get IKEA to fix this is likely to be impossible and they don't provide any kind of email-based support that would allow complex technical issues to be communicated. Even if they could be persuaded that there was a need to make a change it could take months or years before they implemented it.
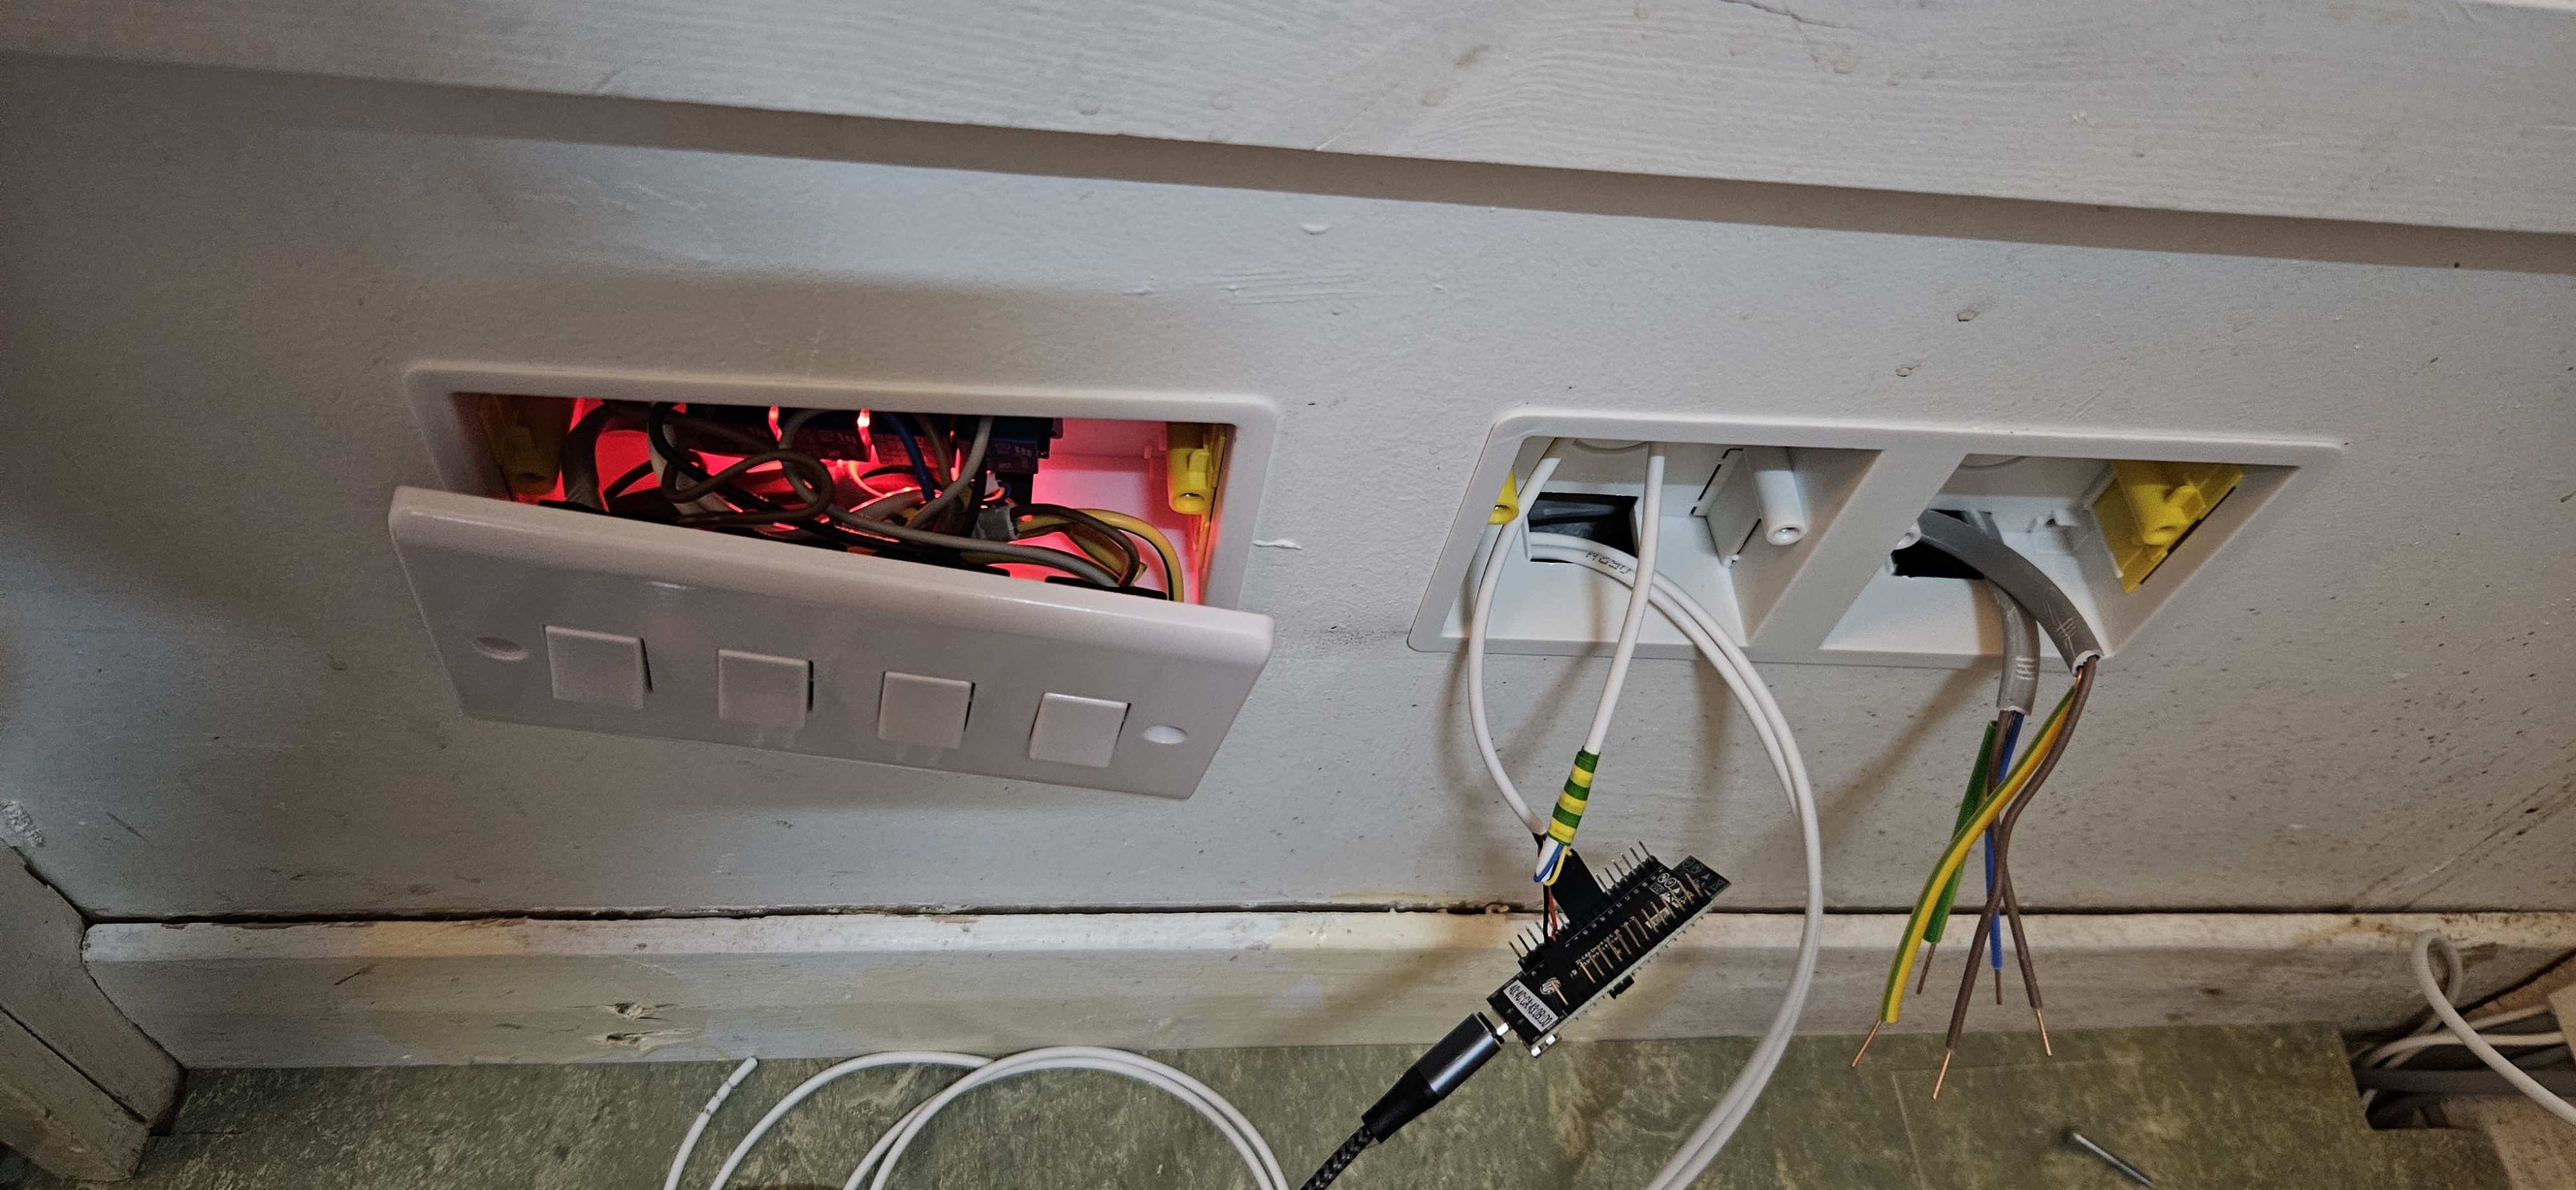
I don't want to wait that long before I can upgrade all of my push buttons to get better battery management, so I've decompiled the latest firmware and determined what to change to be able to disable the double press feature and remove the 400ms delay on single presses:
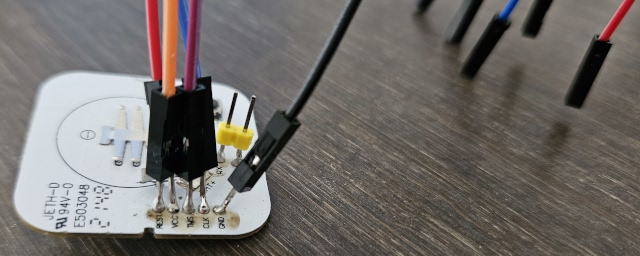
Full details on the firmware modifications and accessing the flash.
With a recent oven purchase I only had one device left that required the clock to be manually synchronised - a timer that I use to turn a light on in the morning. Having had to replace some remote controlled sockets with Zigbee variants I decided to do the same with the light timer so that it can be controlled by a computer that always has the correct time.
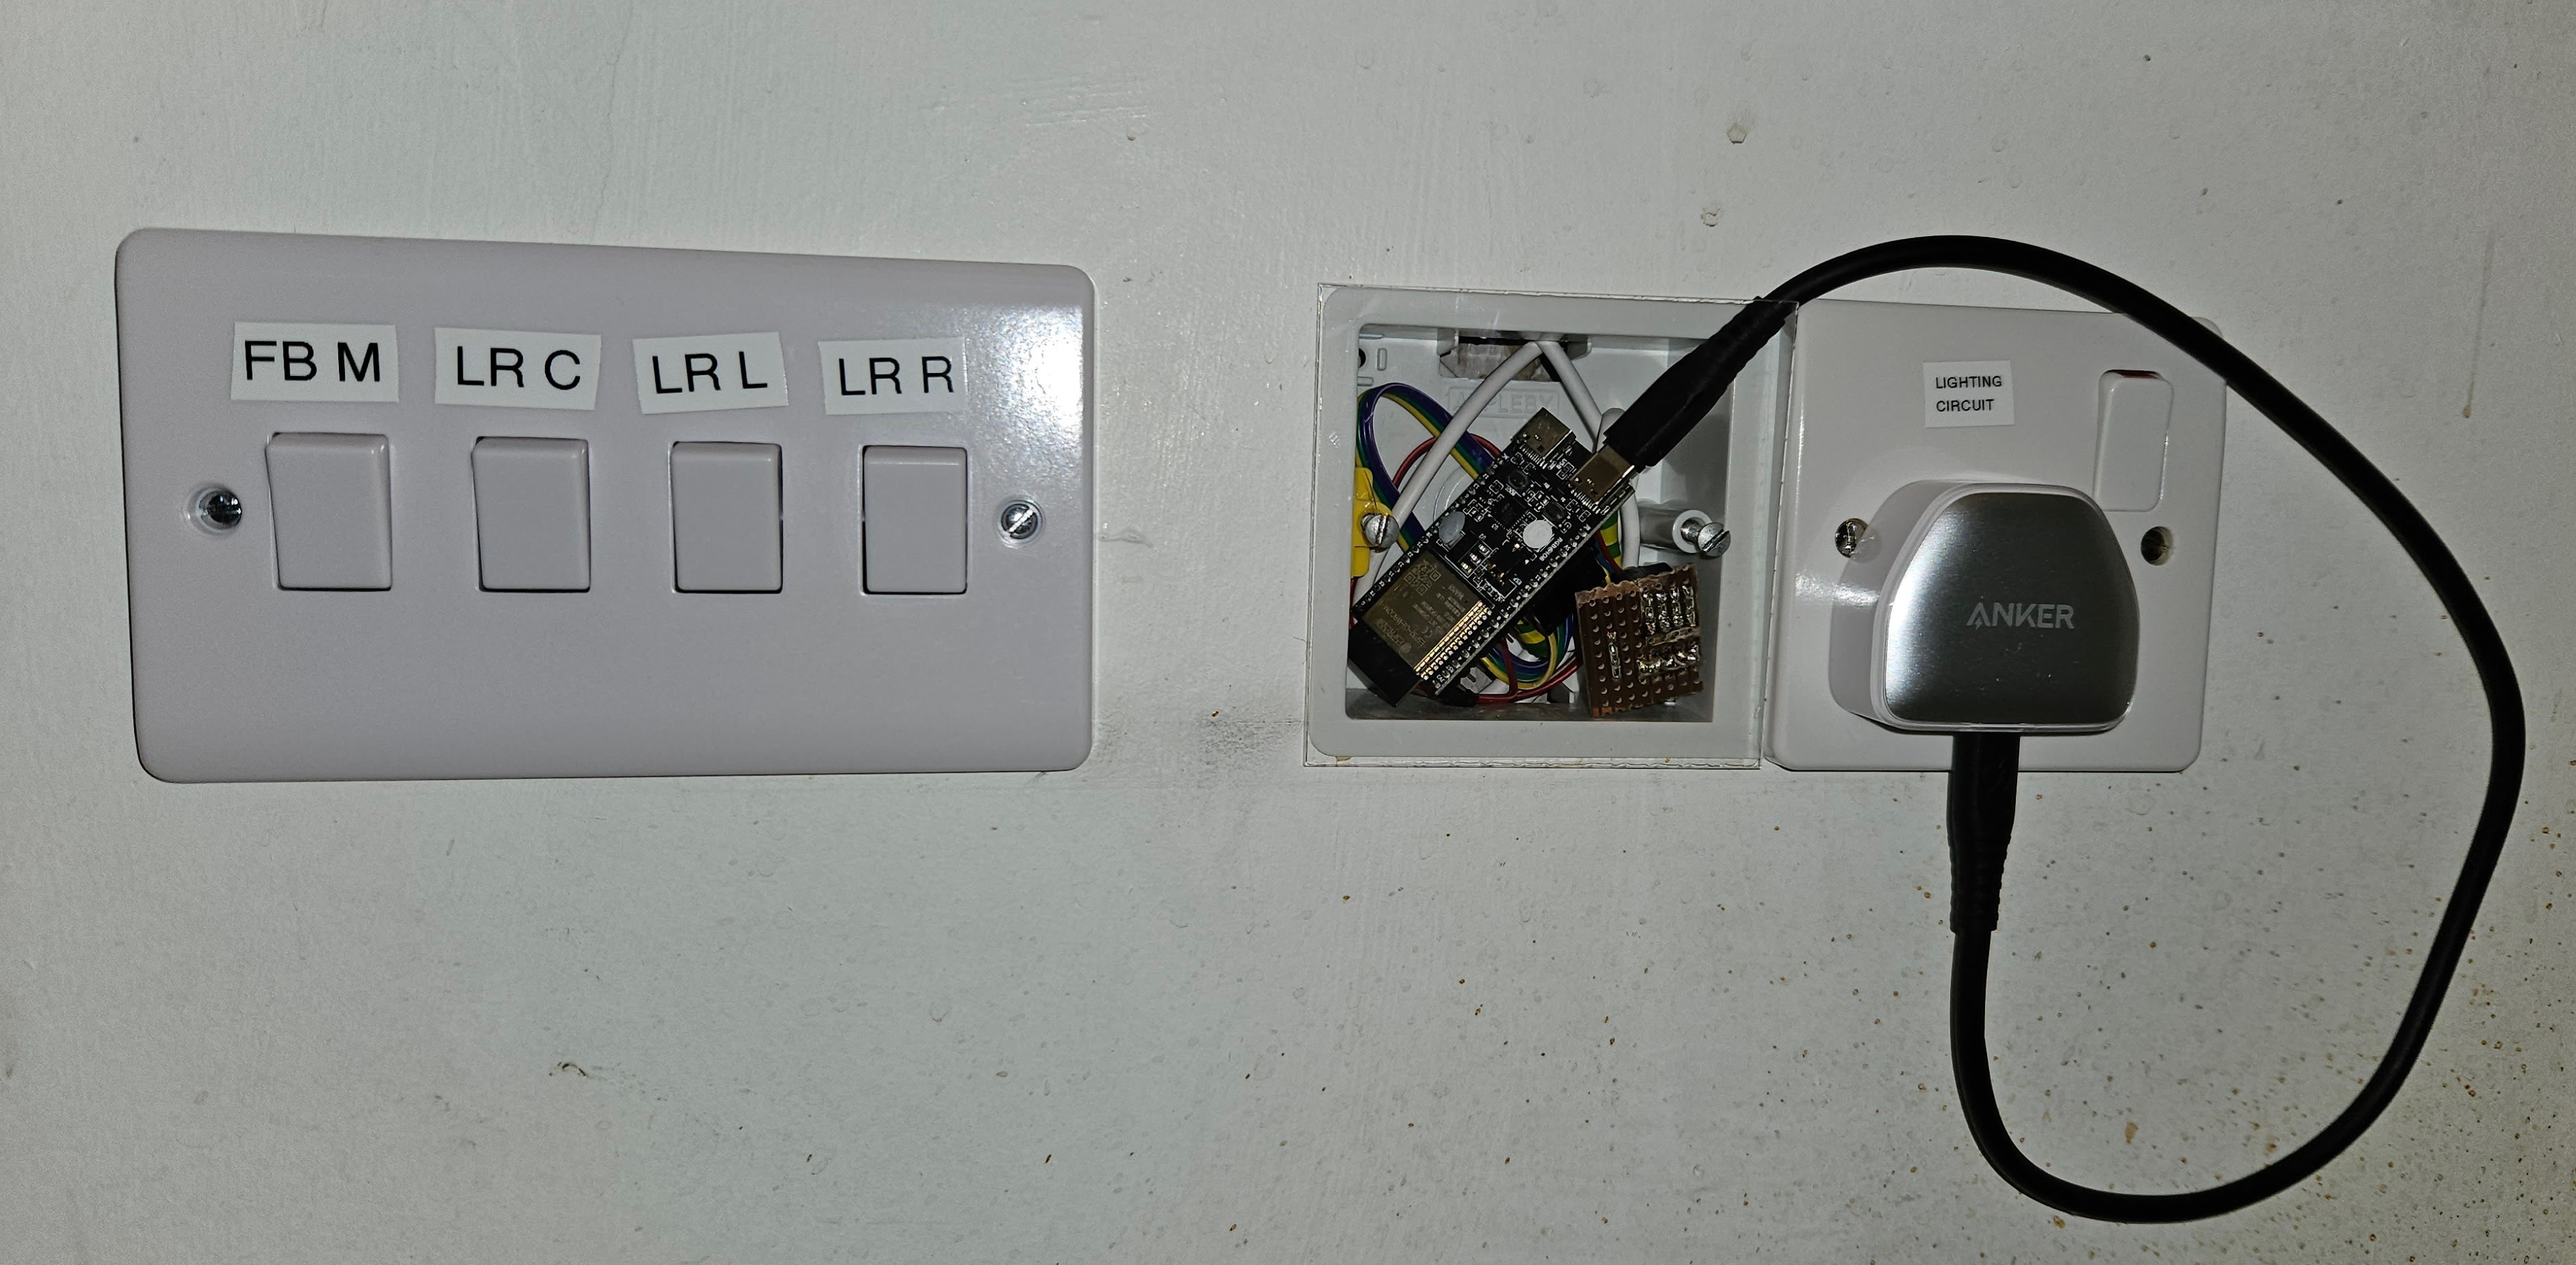
That worked ok but I wanted more integration with the light switch and since my living room lights could already be remotely switched by a different system I have consolidated both of them into a single light controller. There aren't any existing solutions for this that can handle multiple lights and multiple switches (you can have one relay/switch, or multiple relays plus multiple switches but Zigbee doesn't guarantee good integration in that scenario).
Using an ESP32-C6 I've made my own solution, the "Candle Dribbler" that satisfies my obscure requirements for how remotely controllable light switches should behave:
My existing fridge and freezer are over 20 years old and there are better insulated quieter models available that use less than half as much electricity.
Being under the worktop without any rear ventilation uses 25-30% more electricity too because the heat has nowhere to go. The fridge also becomes a freezer in the summer because the trapped heat at the back affects the internal thermostat resulting a feedback loop until my carrots are sitting in a frozen pool of ice.
Not enough space
Before I can get a new fridge and freezer they need to fit under the worktop. There are two popular widths for these appliances (55cm and 60cm) and both of the existing ones are 55cm wide in a space designed for that size only. In order to get the models that I want to fit I need to find an extra 5cm of space because the new fridge is only available in 60cm wide.
The cabinets to either side are made of wood so I took one of them out and made it 5cm narrower:
![[Kitchen cabinet now 5cm smaller with doors that are too large]](/assets/2022/10/15/IMG_20220904_155234_2.jpg)
The cabinet doors are now too wide for the cabinet so one of them needs to be made smaller:
![[Cabinet door cut in half with 8mm steel rod as dowels]](/assets/2022/10/15/IMG_20220906_213430_2.jpg)
![[Kitchen cabinet with 5cm extra space to the left of it]](/assets/2022/10/15/IMG_20220907_125321_2.jpg)
There's now an extra 5cm of space so I can fit a 60cm and 55cm appliance under the worktop.
Not enough ventilation
The instructions for the new fridge and freezer come with warnings of damaging the compressor if there's no ventilation at the back. Some of the heat can escape over the top (to the front of the worktop) but not enough to stop an excessive build-up of heat in the summer.
I cut a long narrow ventilation hole in the back of the worktop and laser cut a cover for it out of plastic:
![[Kitchen worktop leading into the dining room with a 6cm wide vent at the back of it]](/assets/2022/10/15/205_7696_2.jpg)
![[Kitchen worktop from above with a 6cm wide vent at the back of it]](/assets/2022/10/15/205_7707_2.jpg)
There's now enough ventilation for the heat to escape at the back. Be careful doing this with old appliances because my freezer immediately developed a condensation problem now that the excess heat was no longer warming the outer surfaces.
New fridge and freezer
With all the worktop and cabinet alterations complete, I can now install the new fridge and freezer:
![[Under-counter fridge and freezer below the kitchen worktop with a 6cm vent at the back aligned to the space between the cabinets and combined width of the two appliances]](/assets/2022/10/15/205_7745_2.jpg)
Johnson's have shrinkflated their packs of soap from 4x100g down to 2x90g bars. This had been selling for £1 for several years so it was overdue for a simple price increase, but instead of doing that they've gone for the deceptive option of shrinking the product to make it appear cheaper when actually it won't last as long; the extra packaging will increase the overall cost and produce more waste.
The price is still £1 but that now only gets you 180g instead of 400g of soap - an increase of 222% with more outer packaging per bar.
")
£1.00 (25p per 100g)
")
£1.00 (55.6p per 100g)
I've recently changed from a SATA SSD to NVMe SSD for my Windows PC and there's a format option for the NVMe SSD to use 4096 byte sectors for better performance.
The NTFS boot sector (at the start of the partition) contains references to the sector size of the disk. This is unnecessary information on more modern filesystems but NTFS is 28 years old. Changing the following little-endian values allows Windows to use the filesystem without needing to recreate it (instructions assume a 4K cluster size):
| Offset | Size | Name | Modification |
|---|---|---|---|
| 0x0B | 2 bytes | Bytes per sector | 0x0200 (512) → 0x1000 (4096) |
| 0x0D | 1 byte | Sectors per cluster | 0x08 (8 * 512 = 4096) → 0x01 (1 * 4096 = 4096) |
| 0x1C | 4 bytes | Hidden sectors | The number of sectors preceding the partition |
| 0x28 | 4 bytes | Total sectors | The partition size in sectors |
I've changed keyboard to one without a number pad so I've made my own numeric keypad using a YMDK kit and countersunk some black hex screws to make it look nice:

There's an extra row on the top for additional keys and the LEDs on the bottom of the keypad light up to indicate the number lock state.


